Gaussian Splats Pt. 2 - Software Workflow
I'm excitedly reading about photogrammetry and gaussian splat workflows and not too far into the process I have the realization that most of the popular and widely used software in multiple places of the workflow chain requires an Nvidia graphics card, which I do not have. I do have a high end card that I spent a bunch of money on, but it is the AMD video card I mentioned earlier which does not support the needed CUDA libraries used by many machine learning implementations. This isn't the first time that picking AMD over Nvidia has bit me, but honestly I'm okay with it. Nvidia has a monopoly on GPU compute, and is an anti-competitive company with an antagonistic relationship with open source software. I feel like I'm doing my part to fix it by not buying their stuff, even if that means I get to miss out on some cool thing they've patented and are preventing anyone else from using. I digress. I resolve to figure that problem out later, once I get an understanding of the full process.
In my reading I do learn that the main basic steps of creating a splat scene are as follows:
- Capture the scene or object via photo or video
- Stabilize the capture data, discarding out of focus or blurry images
- Generate estimated camera positions for each photo
- Take the photos and camera data and train a machine learning model on them to actually construct the 3D point cloud
- Edit and clean up the 3D scene, and optimize for web display
I had already gotten the capture basics largely down, so I evaluated my options for stabilizing the data which mostly consisted of scripts that people had made and shared online. I dug around some more and found a program called Sharp Frames that automated the process and even extracted good frames from video and exported them to images. It's options are pretty granular, but I've found it sufficient to just discard the top 10-15% of images that it detects to be the blurriest. I made an effort to avoid motion blur when capturing with the DSLR anyway, so I'm not sure a more aggressive approach would yield better results. I frankly probably have been taking too many images anyway.
Next up was generating the camera position data. This is done via a concept called structure from motion, which is done by basically taking a bunch of 2D photos and analyzing how objects move between the photos to figure out the 3D shape of the scene. Parallax is important to be clearly on display in the photo data, so it usually works best if you feed the photos to whatever program you use sequentially. My main options here were:
- RealityCapture
- PostShot
- COLMAP
- MetaShape
I'm excluding cloud based tools here, focusing on things I can run locally to tweak settings (and also avoid subscriptions). Out of these, PostShot costs $30 a month anyway and requires CUDA so that's a double nope. RealityCapture is free (subsidized by Epic and their Unreal Engine revenue) but again, CUDA. MetaShape works on AMD but it starts at $179 for the standard version, which I can't justify at all. My only real option was COLMAP which is open source, but of course the hardest to use and probably the most temperamental. COLMAP does not have AMD support by default, but a helpful reddit comment pointed me to a fork called COLMAP-CL that does.
I try it out with the stone head model I've been working with as my main test subject and it was immediately apparent how slow COLMAP is. My hardware utilization was sitting at 5% after an initial spike to 99%, and it took multiple hours to just get the camera data. I'm trying to experiment and iterate, so I really needed something faster.
I did some more digging and found a program called GLOMAP that processes the photos a different way that greatly speeds up the process. COLMAP's process comes down to basically finding two photos that match, combining them, then finding a third photo and combing with that (and so on). GLOMAP looks at all the photos at once, arranges them all roughly where it thinks they should go based on color, and then combines them all. This process still takes time but it's like 10 to 50 times faster on most data sets. The processing I was doing at this point went from hours to minutes, which was much more palatable.
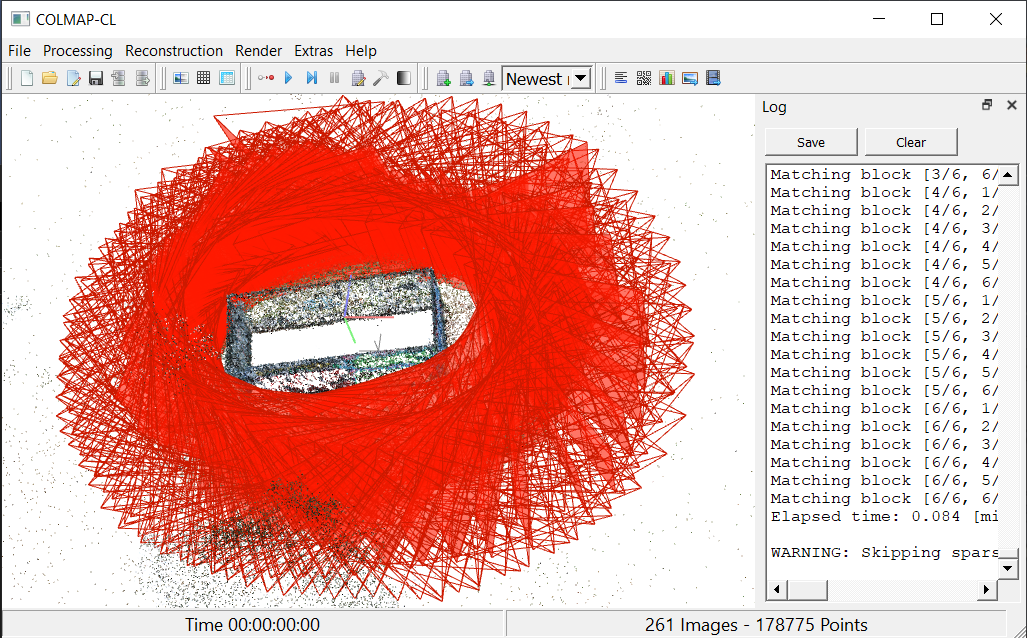
At the end of processing the images and generating the camera positions, the program shows you a 3D model of a bunch of tiny cameras in space that kind of looks like the bullet time camera rig that they used in The Matrix. It's pretty neat. There are some more sub-steps here, mainly involving fixing erratically placed or out of place cameras and re-estimating. You can also tweak how many points it bases connections on, but for now I had decent enough results with the defaults.
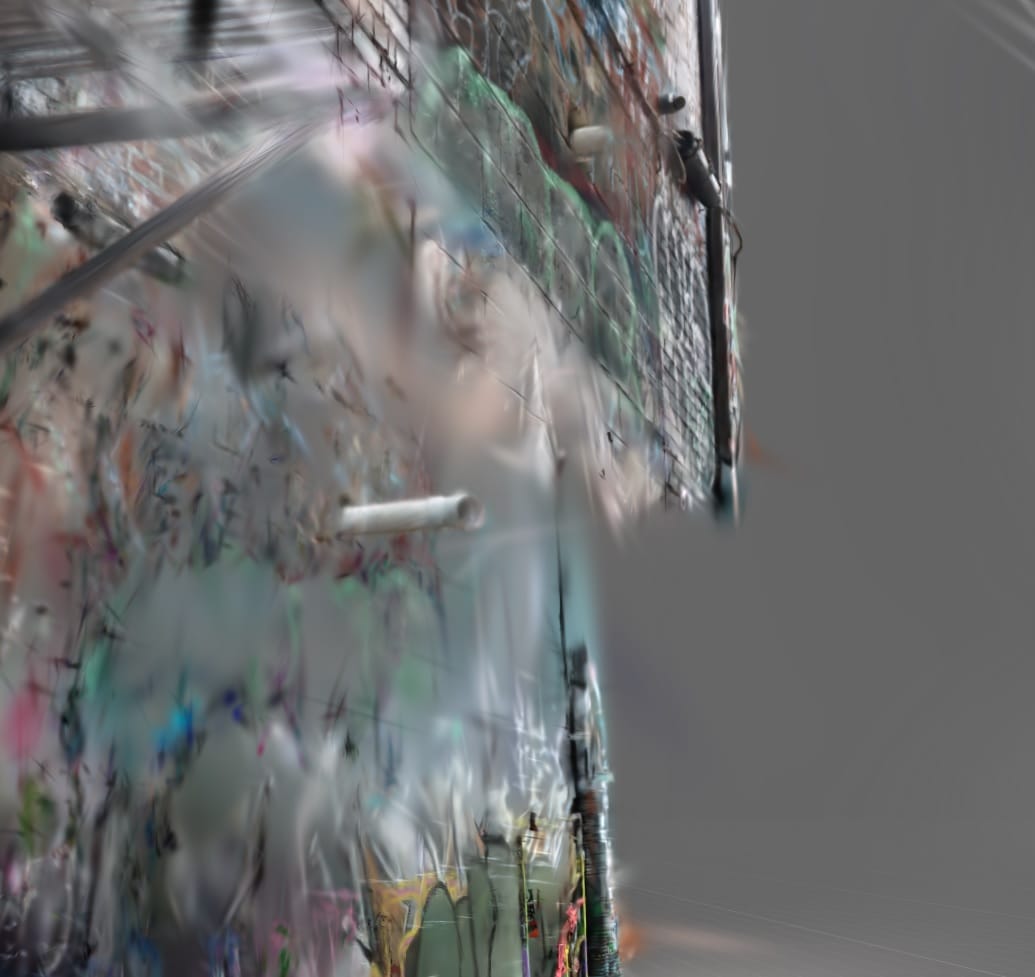
The importance of proper camera alignment really can't be overstated, as sharpness and general scene geometry depend on it. If things are not correct here, you can get final results like the picture below where the wall is not properly aligned. I did not realize this until after the render was complete, I started it before I went to bed since the scene takes roughly four and a half hours to complete on my machine. The render otherwise turned out great, and was the most detailed that I had produced up until that point. You can re-align in COLMAP by simply running it again and again until it looks good, or try to manually align.
The next step though is actually creating the splat scene, and constructing the 3D image via the images and the estimated camera positions. This done by a machine learning algorithm that came about in 2023 from a research paper that kicked off gaussian splats being a practical method for creating 3D scenes, and not just the theoretical that it had been since the early 90's. My main options here were:
- The original 3DGS Python implementation from the research paper
- PostShot (again)
- NerfStudio
- LichtFeld Studio
- Brush
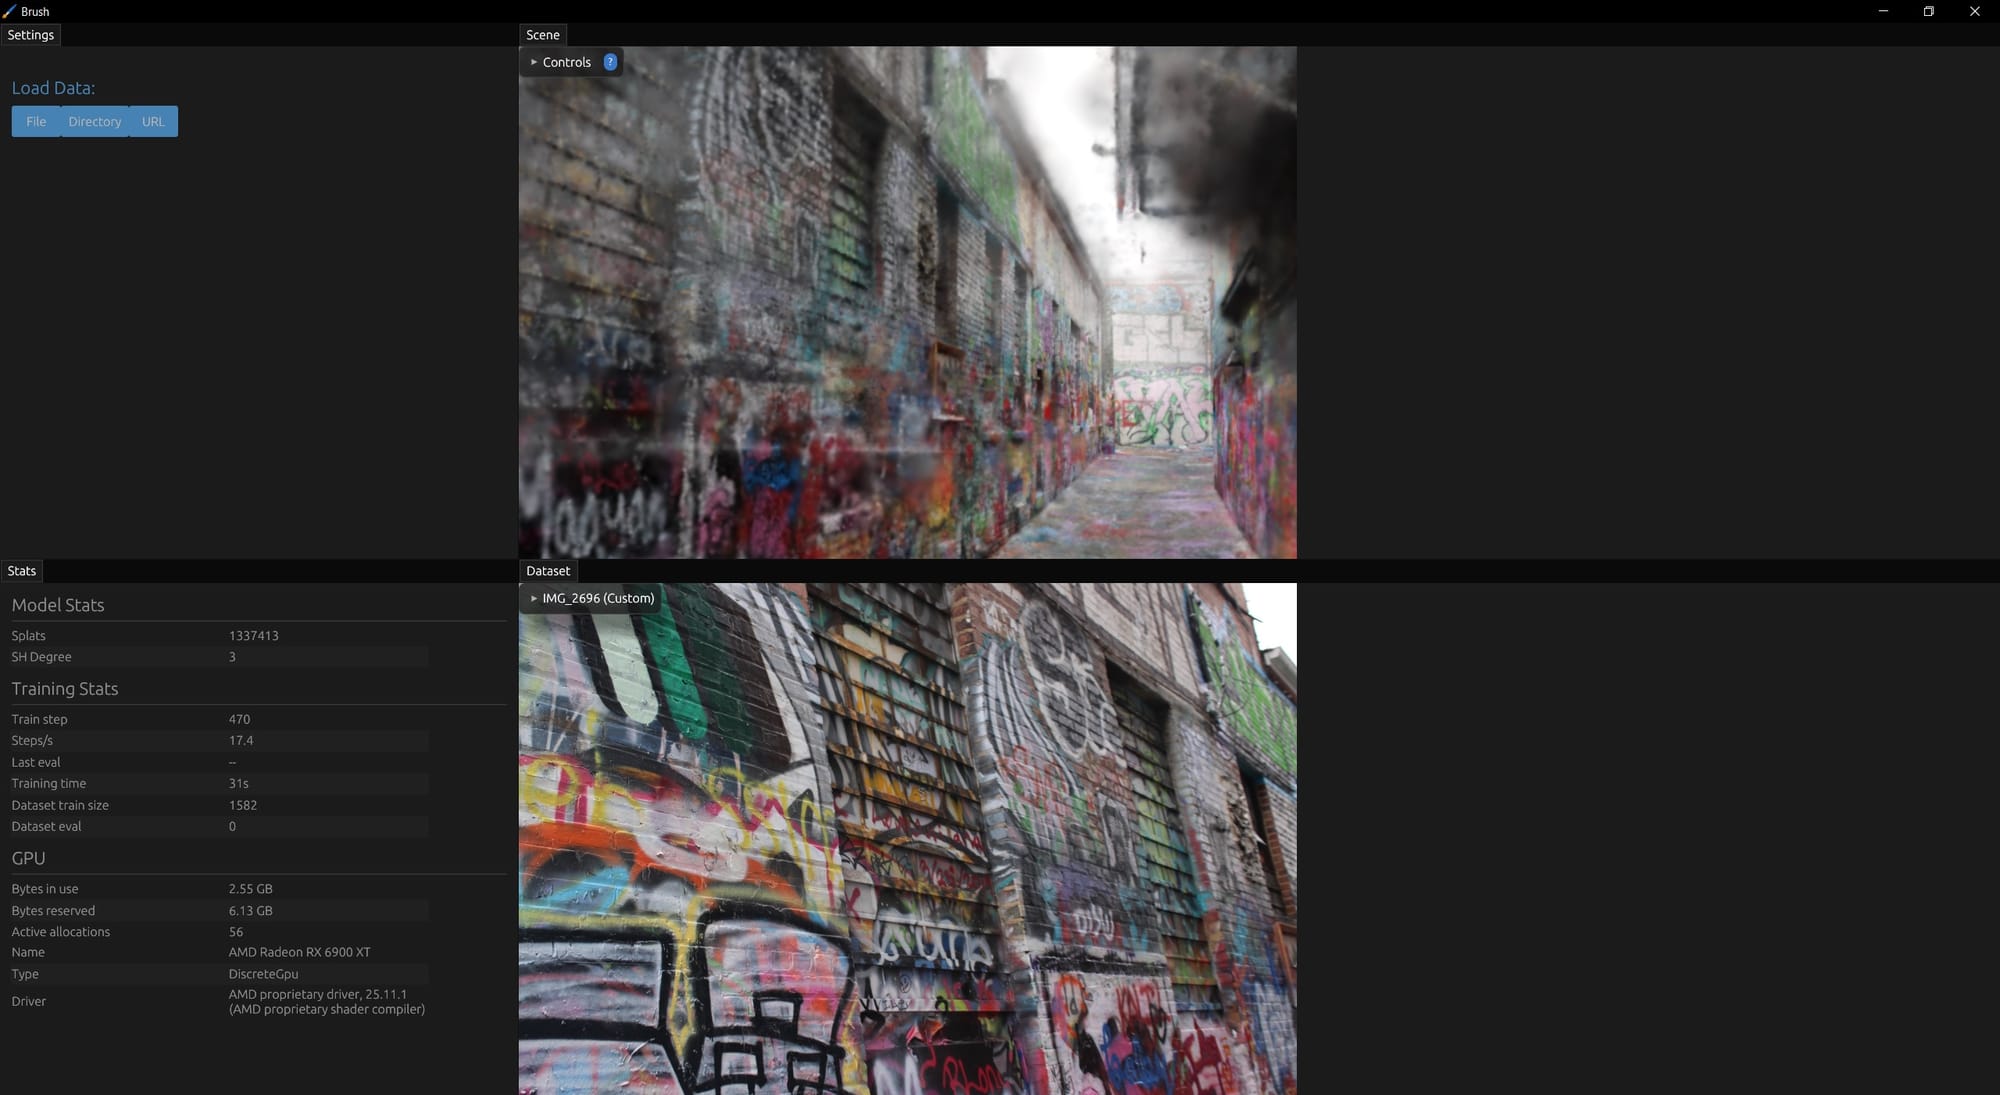
Brush, as far as I can tell, may be the only viable option for non-Nvida GPUs at this time, every other option requires CUDA or a hacky compatibility layer work around. Using it is fairly straightforward, you simply load the directory with the photos and camera data and it then presents you with some settings options. I'll break down these settings later, as this is the main step that affects how the end result will look. My first run though I just ran with the default settings and it produced a pretty great result! It took 45 minutes or so, and the level of detail was absolutely a step up from Kiri though not quite yet where I wanted it to be.
The last step is editing the scene, and this step was by far the easiest to find a tool for. I had been looking at scenes on a website called SuperSplat, which displays scenes via an interactive viewer. They had a built in editor linked and immediately accessible on the website, so I made an account and uploaded the .ply file that Brush spit out. I usually opt for local software, but SuperSplat is free, open source and I could host it on my own server if I decided to later down the line. There are other options, but I tried this one first and see no real reason to try another.
SuperSplat is easy and intuitive to use, especially if you've used any kind of 3D modeling software or even Photoshop. I'm mainly using it to set the position and scale, along with cleaning up scenes by cropping everything outside of the area of focus and removing "floaters" or clouds that arise from the rendering process not knowing where to put certain points.
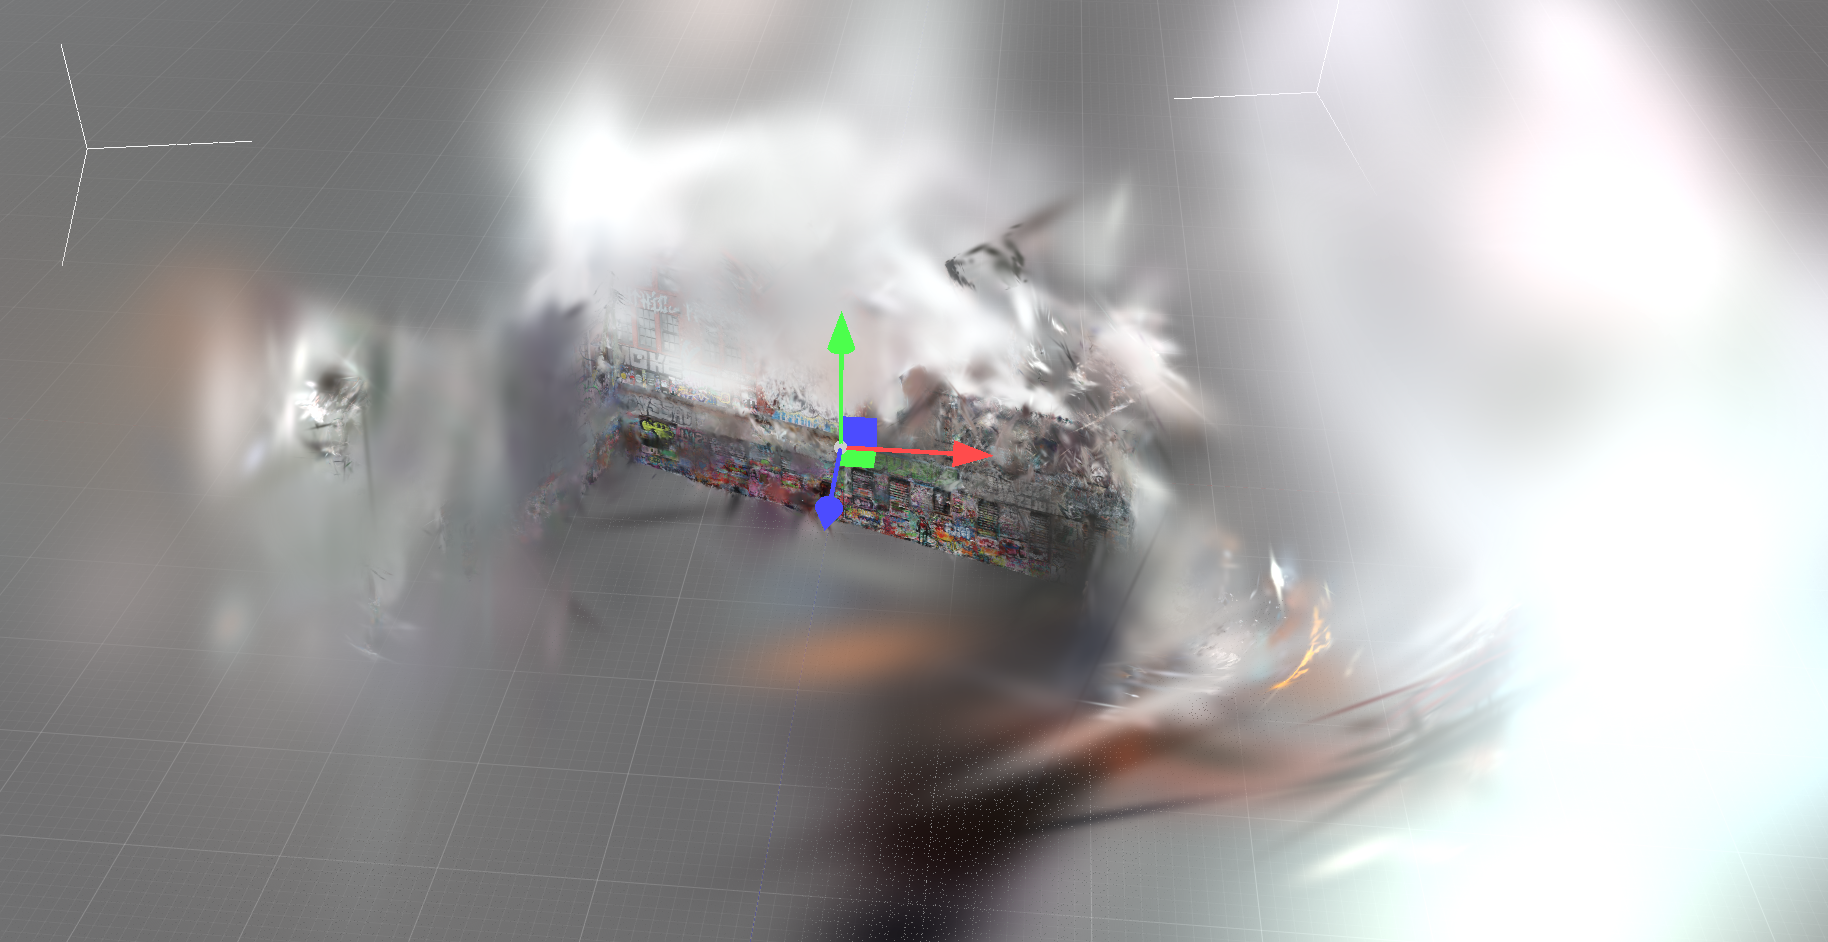
I live and die by the polygon lasso tool here, though I also use the occasional brush to select points to delete. Much like other editing software you can import another model into a space, so theoretically you could render a scene in smaller chunks and then stitch them together to maximize detail. That's a level of complexity that I'm not quite at yet, but I'm absolutely going to try that eventually.
Once the scene is cleaned up, you can export it back to a downloaded .ply file or publish it directly to your SuperSplat profile, which automatically optimizes the scene and compresses it to be easily viewed in a browser. The compression is kind of crazy, I've seen space savings of 90% between the uncompressed export and the web version with little visible difference.
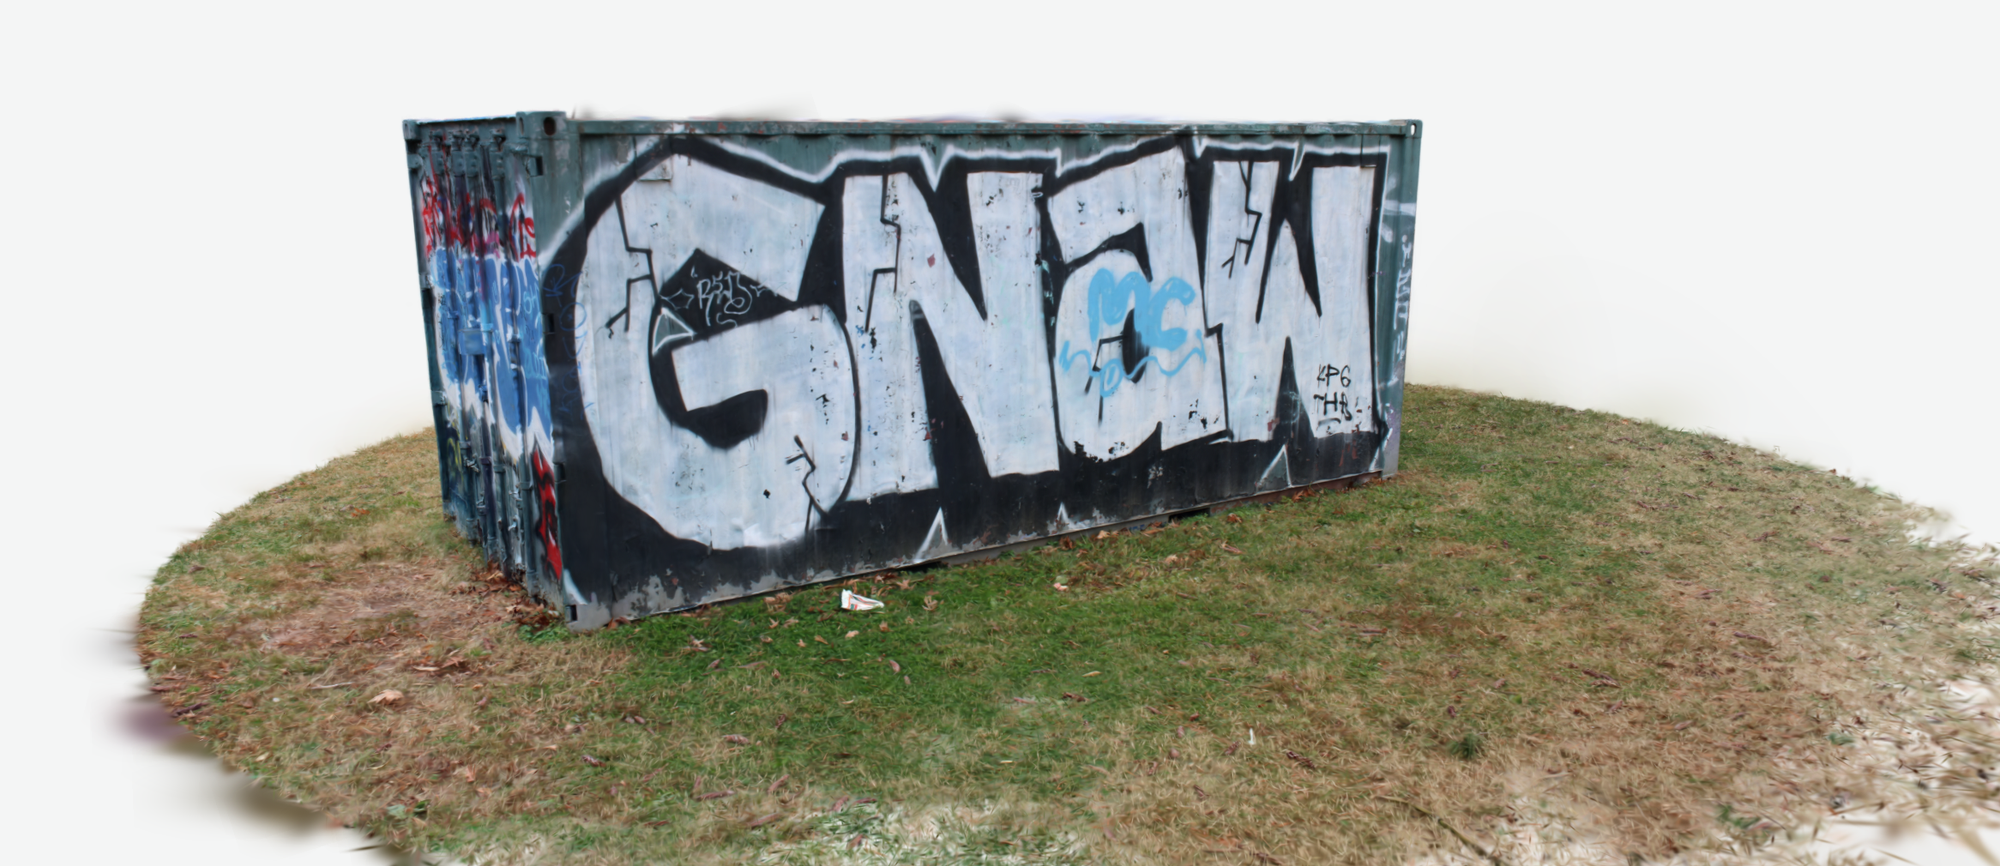
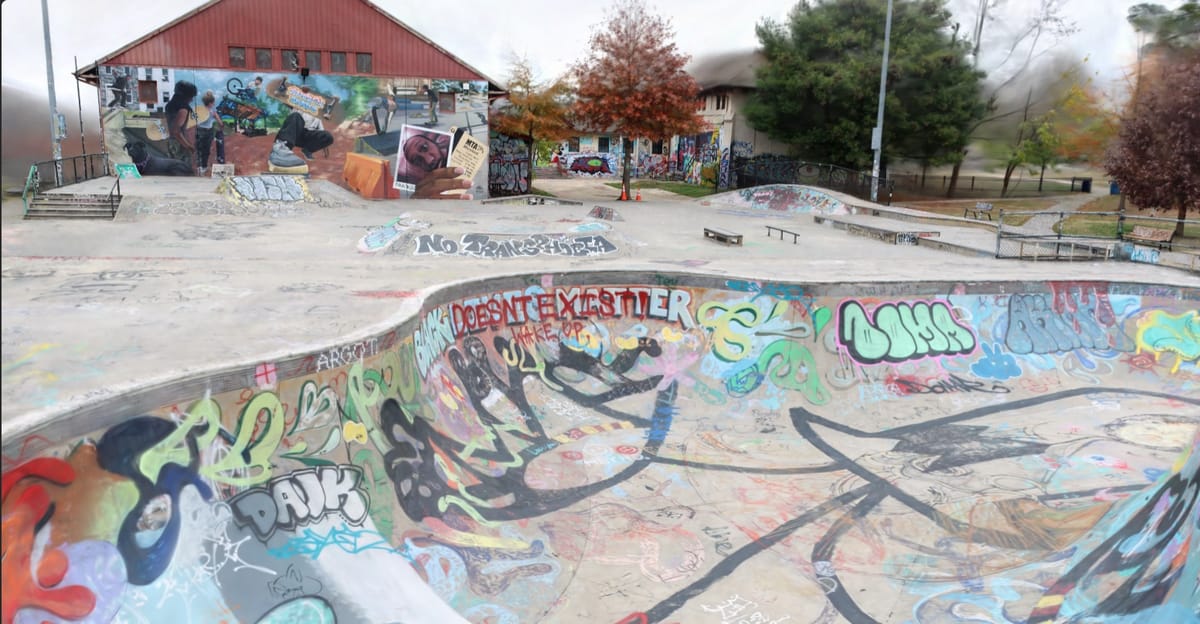
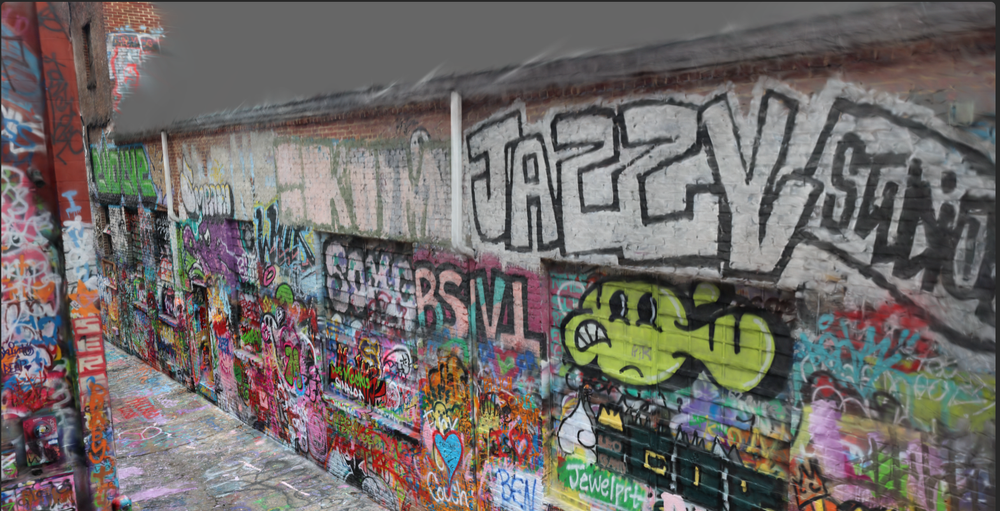
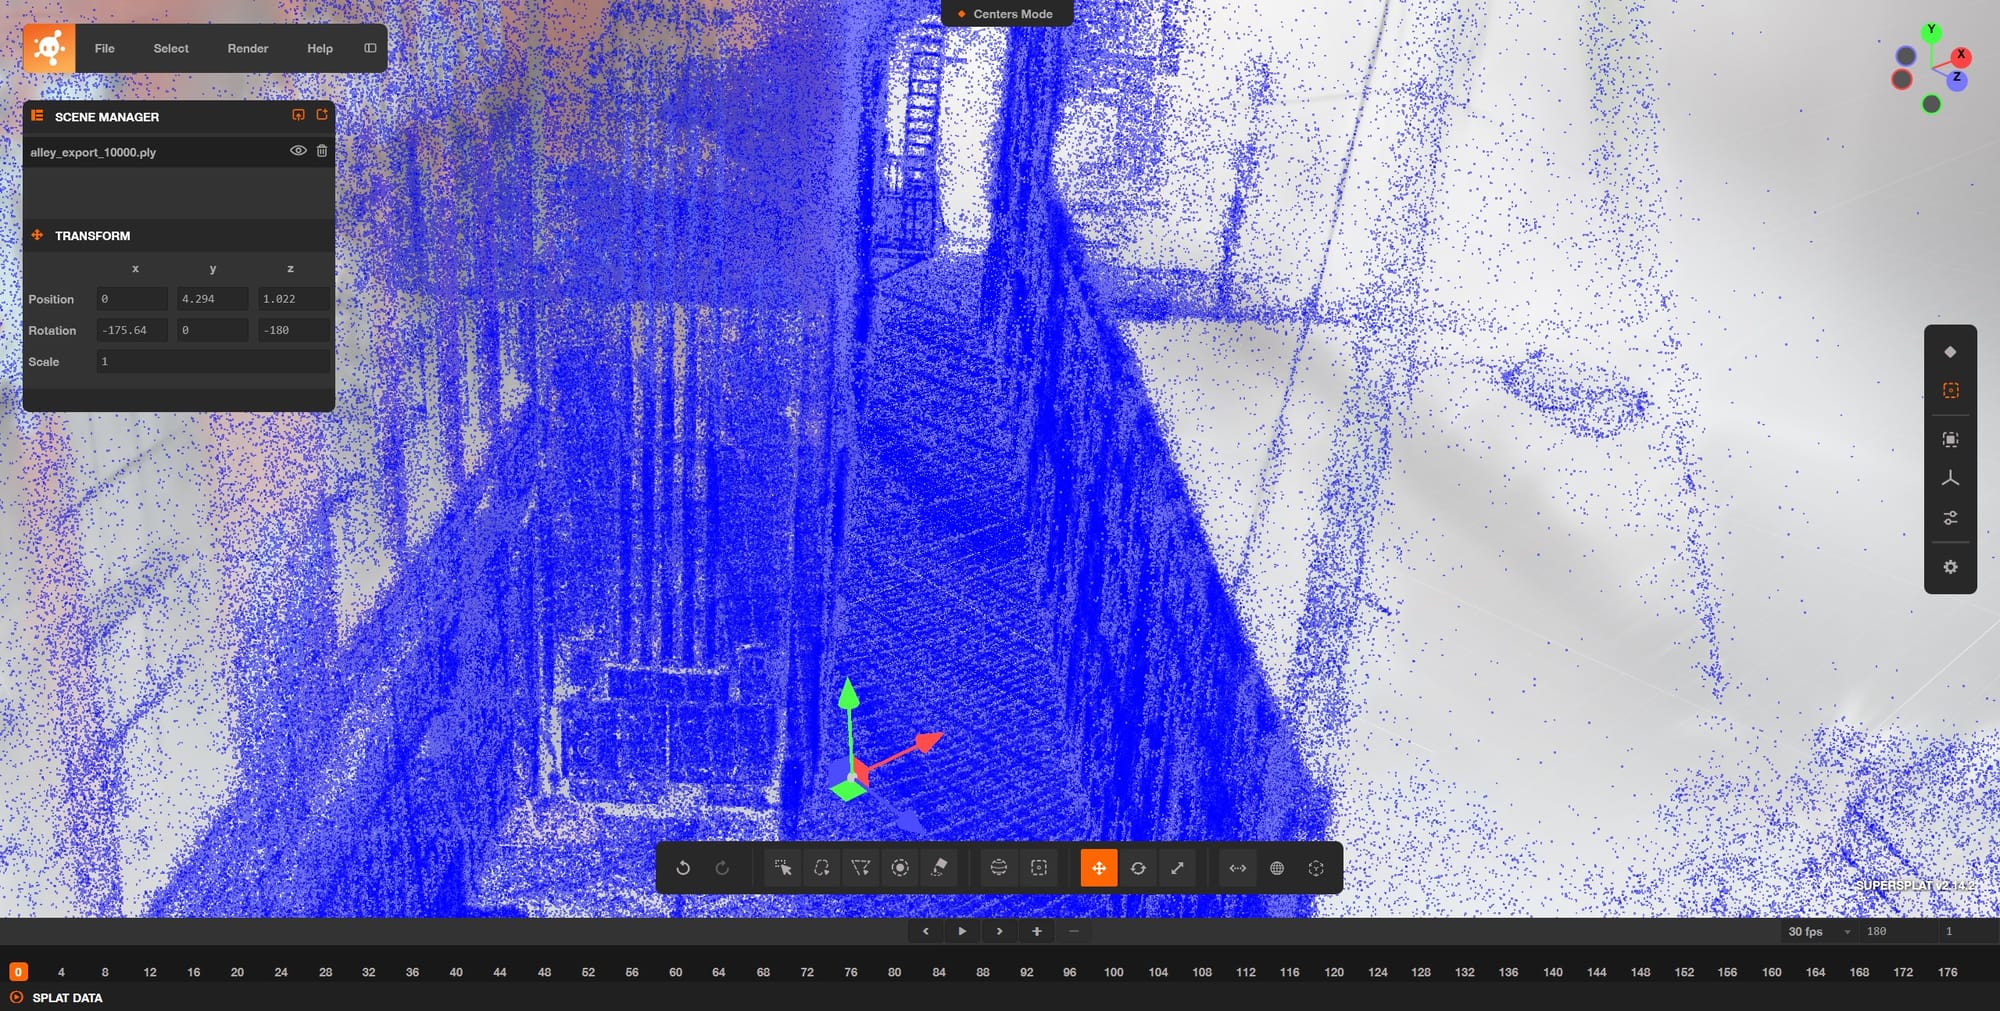
During my time ironing out the workflow, I started experimenting with bigger scenes and dove further into refining for detail. I'll continue with a post on that but below you can see the completed Graffiti Alley render that shows where I am at this point in terms of scene size and complexity.